Tuesday, August 24, 2010

Shingles

Yesterday I dyed the shingles. I had ordered two colors of dye- brown and grey. The effect I'm hoping to get is of a multi-colored roof. If you look really closely you will see three shades.


The first batch (about 3/4 of the bag of 1000 shingles) I did grey. I didn't want a really light brown, so for the second shade I added a little more water to the grey I was using and then dumped the brown dye into the grey. They came out a nice autumn brown. For the in-between shade (really hard to see in the photo), I then took a portion of the ones I had dyed grey and put them through the brown/grey stain a few times. This resulted in a darker brown shade.

I'm happy to see that they are drying nicely. Yesterday they just looked like a giant blob, but today I am able to see more of the actual color. I'm hoping to start attaching them this weekend.

Miniature World Heritage Buildings

This may be old news to some, but thought I'd share. A great blog that I follow, Amusing Planet, has a wonderful post today on miniature world heritage buildings in Japan. Check them out! I can't imagine how long it would take to do that many fantastic miniatures.

Here is my favorite! I have always wanted to visit Abu Simbel. Very cool!


Friday, August 20, 2010

Railings and Shelves

It's starting to come together! I installed the railings that I built the other day, placed the two counters (they are freestanding-- still not sure how I'm going to arrange things at this point) and built some of the shelves. There are plenty more shelving parts, but I want to take some time to think about my layout.


Monday, August 16, 2010

Who Knew Work Could Be So Fun?!


A few evenings ago I caved in and asked my husband for some help. I can use just about any power tool, but I hate drills. I can never seem to hold them steady and they always slip out of my hands so I asked him to help me drill the screws for the hinges. Thanks to him the roof and store fronts are now functional! Hopefully that will be the only help I need.

I had so much fun today and got a ton done! I added a second coat of paint to the exterior and installed the windows. I thought that my corners on the windows were square, but learned they weren't so I did a lot of sanding and shaving to get them to fit. Live and learn!

The stairs were built and installed. The railings are now done, drying and waiting to be installed.


Hopefully this week I will find the time to dye the shingles. I'm a little nervous about this. I bought a brown and a grey dye and I'm going to do a little experimenting. I love roofs that have differing colored shingles, so we will see how it goes.. Any advice would be more than welcome :)


Saturday, August 14, 2010

The Bug Has Caught Me


Even though I have not had a lot of time to work on my project this week, I am beginning to see how this hobby can turn into a little obsession.

As I'm driving down the road looking at houses I imagine what cool miniatures they would be! I have "browsed" the multitude of ebay listings (just looking of course-lol) on more than one occasion and am already plotting and planning what my next project will be ;)

My question is what do people do with their miniatures once they are finished? I mean I have a pretty big house, but I don't think my husband is going to be too pleased if these miniature little mansions start multiplying like bunnies. Any suggestions?

Friday, August 13, 2010

I Want a Magazine!

As I mentioned in a previous post, I work in a bookstore. Much to my frustration, there are miniature magazines for planes, trains, automobiles, military miniatures, gaming miniatures, art dolls, and just about every other subject known to man (including chickens!), but no miniature dollhouse magazines!! Why?!?

I have looked online and saw a few. I would love to know if anyone has miniature magazine recommendations.


Wednesday, August 11, 2010

Building Day

Today was a day devoted to putting the pieces together! My first obstacle was figuring out how to pre-punch nail holes. My only other experience with a dollhouse was one that was given to my daughter years ago. I have no idea what brand it was, but it was very flimsy and cheaply built. Not so with the RGT kits! This is some serious wood! 
The wall in the middle is temporarily there to support the loft.

I was so afraid of nailing the holes too hard. I didn't want to split or ruin my project. After a little trial and error, I figured it out and was pretty surprised that I could actually hit the nail pretty darn hard with no splittage problems. The directions recommended doing this on a thick stack of papers. I just laid the pieces down on carpeting. 


Having two sets of hands for the assembly probably wouldn't have been a bad idea, but it really wasn't that difficult by myself. I used Elmer's Stainable Wood Glue and nailed where specified. The hardest part was maneuvering and holding the two roof peaks together- holding them steady while I tried to tape them in place.
gluing the storefront together

So far I'm pretty proud of my progress! It's starting to come together :)  I guess all those hours spent in my dad's garage weren't wasted afterall!
Starting to look good!


Tuesday, August 10, 2010

A Million Little Pieces..

I have decided in keeping with the bookstore theme to keep the interior pretty simple, in order to bring more emphasis to the books and decor. I have stained the interior walls and floors with a natural stain. The stairs, banisters, rails and shelves were stained in a warm rosewood. Boy all those little spindles took a long time-- all 60 of them!! Everything was sanded and stained twice.

Doors and window frames were painted with dark green Benjamin Moore samples. Again, I wasn't happy with the eggshell finish, but didn't want to buy a pint, so I decided to do a little experiment. I happened to have some gloss Mod Podge on hand so I applied a very thin coat over the green and I think it turned out pretty well!


Even the mundane tasks of sanding so many little pieces and staining the same little wooden dowel 60 times (x2), I have to say that I have found a real Zen in these menial tasks. When I'm working on my miniature, the world seems to drift away, I zone out on Pandora music coming from my phone and let my mind wander. What a little bliss of "me" time!! Love it!

Sunday, August 8, 2010

It Has Arrived!! Oh Happy Day :)

I was so happy to see the Real Good Toys package leaning up against my door when I got home! It feels like Christmas!! Wow, the box was heavy! I was beginning to wonder just how many pieces were in this box.
fresh out of the box!

I took all the parts out of the box. I was totally impressed by the quality of the wood. Very thick, not flimsy at all. Now I see what they say that these could be enjoyed for generations. If you start with good quality materials and put the time and effort into it that it deserves, it is sure to be a treasure.

I spent half the night sanding pieces. A little frustrated that they are not sanding as well as I would like, but I read that a light sand over the first coat of paint normally does the job.

Painting the exterior walls- Since it is not a huge house/shop I thought I could get by with the little paint samples from Ace Hardware. Went home and painted. Wasn't happy with the eggshell finish, but I thought I'd sleep on it. The next morning I was equally not happy, so I went and picked a slightly darker shade in semi-gloss. I think this will work. Did one coat, I'll do another after assembly.

Choosing My First Project

Wow! I had no idea there were so many miniature choices! As I started doing research, there were (of course) your typical Victorian style, Queen Anne style (I love the roof lines, but they kind of remind me of "Psycho"--creepy), craftsman style bungalows, townhouses, modern marvels, and shops.

I work in a bookstore and insanely love books so a miniature bookstore seemed like a fun, logical first project. I can just imagine a million little books neatly arranged on shelves! And of course, no good bookstore would be complete without a cafe to get your caffeine buzz on! I was so excited and inspired!

What I wanted:

- A kit. I wanted a project. Not a simple puzzle that snaps together, but a real project that would take some time and effort.

-High quality. If I was going to spend all this time on something, I wanted good quality materials and something that would last.

-Something that really resembled a bookstore. I wanted a display that was accessible and easy to "maneuver"-- no top-loading for me.

-To stay within my price range. Okay, I went slightly over the budget I intended, but for quality's sake I figured it was worth it.

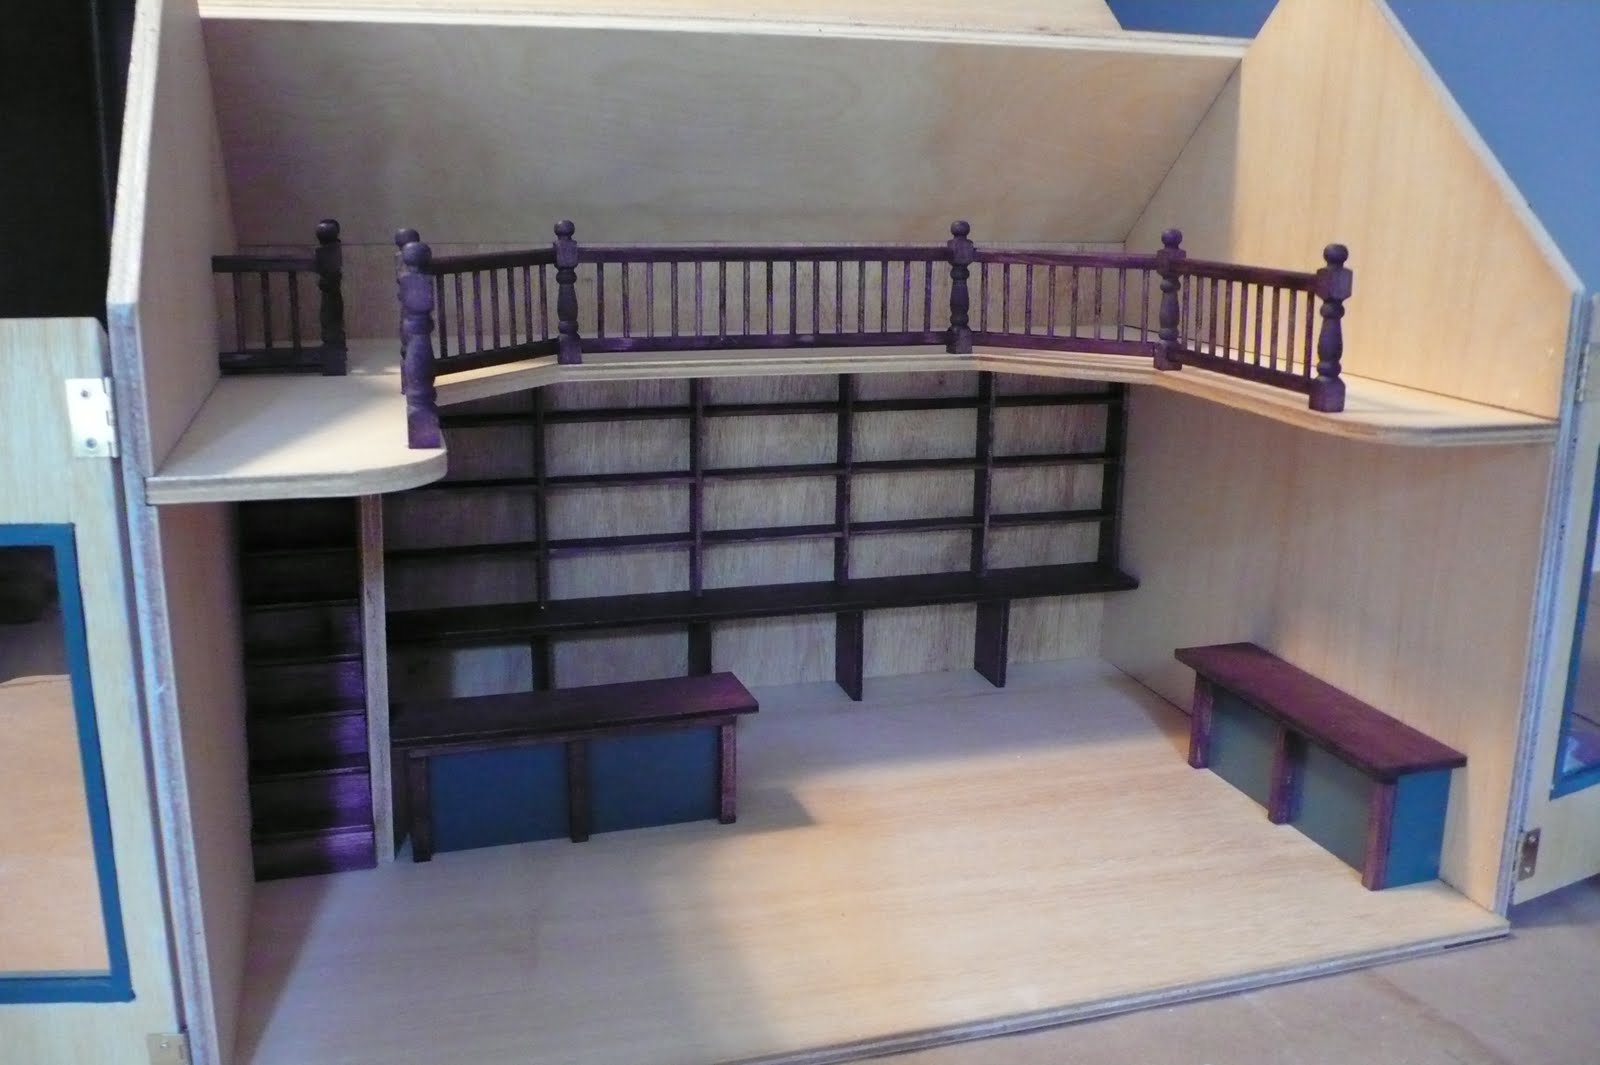
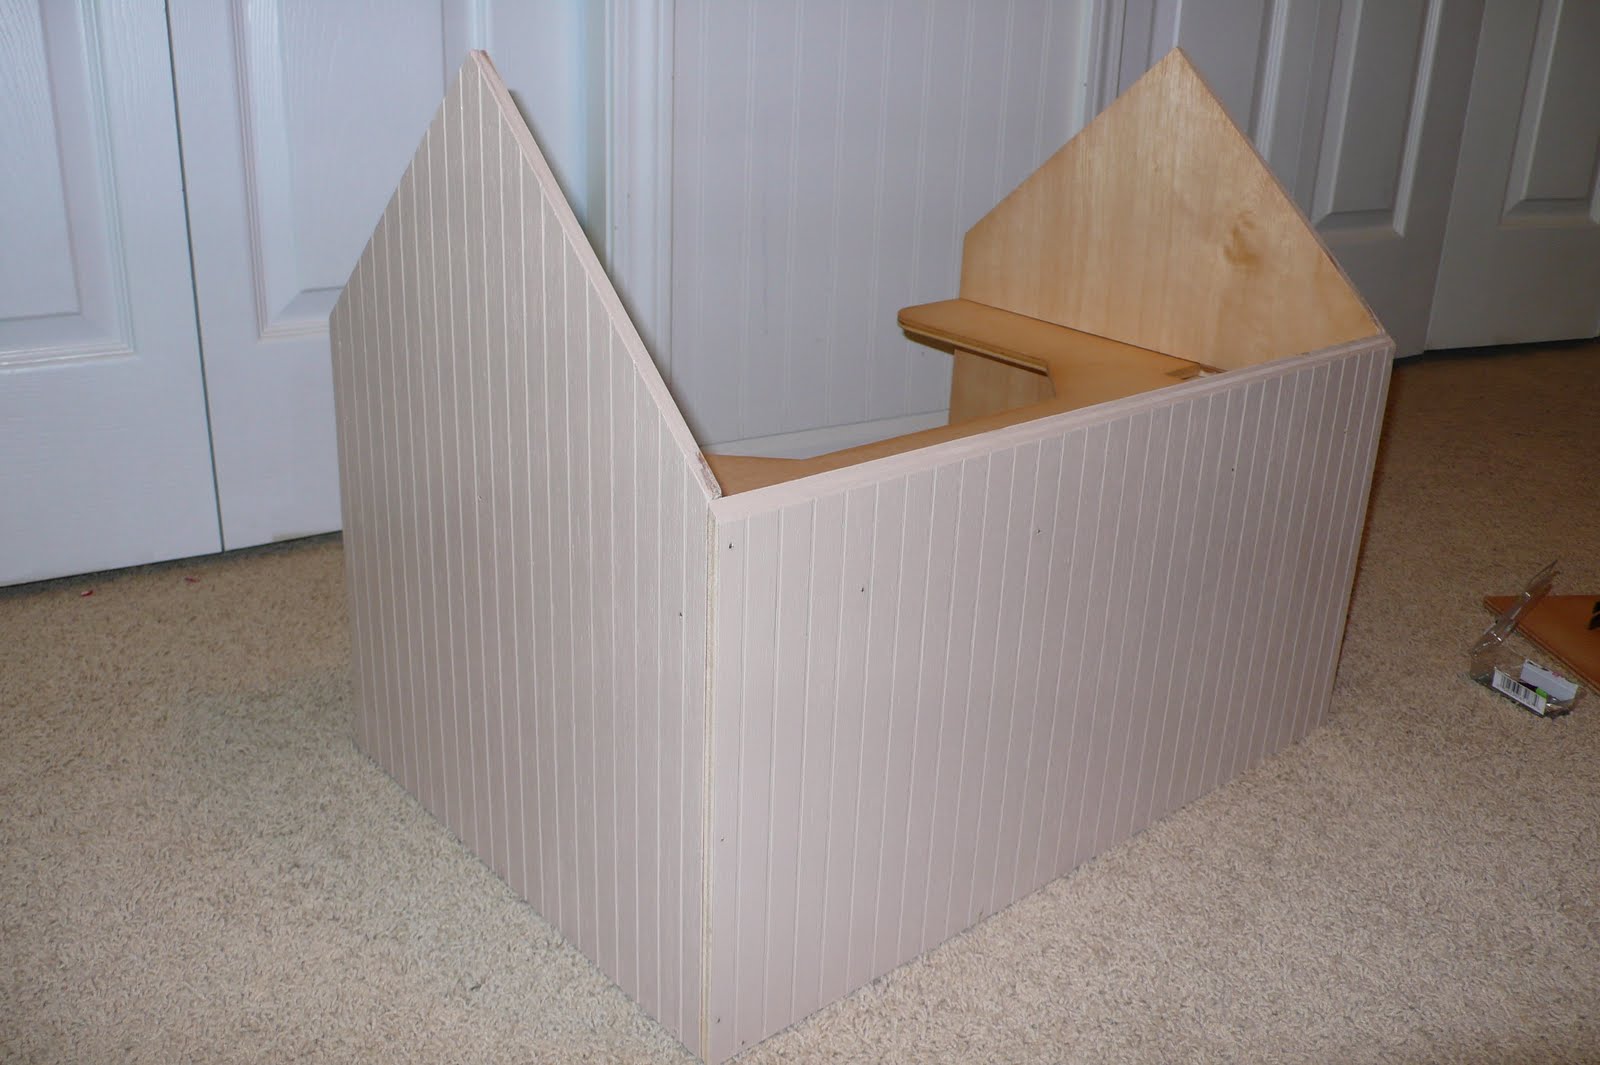
After doing tons of web-surfing I stumbled across the perfect shop! I decided on the Front-Opening Shoppe by Real Good Toys. I was in love!! It had every feature I was looking for! It was just my luck that it also happened to be on special that week. I ordered it!!


Saturday, August 7, 2010

Where to start..

Dollhouses are for little old ladies, spoiled ankle-biters in pig-tails, or wacko CSI psychopaths right? Not necessarily..

I am a mid-thirties, married, well-educated, normal, modern woman. Why on earth would I want to delve into the crazy world of miniatures? The more I thought about it, the idea seemed to meld many of my interests; art, sculpture, architecture, creativity, design, interior decorating and more.

I can't afford to buy troves of houses or redecorate/remodel till my hearts content, so why not tap into that creative energy in another form? I think I will!

I hope you will join me on my new adventures into this hidden little gem of a hobby!